Image orientation on iOS
In this story, we will discuss the workflow from taking picture, to the persistence of picture on the file system.
As a developer we sometime have to produce pictures and export them. After in the workflow, we import them… and we lose the orientation.
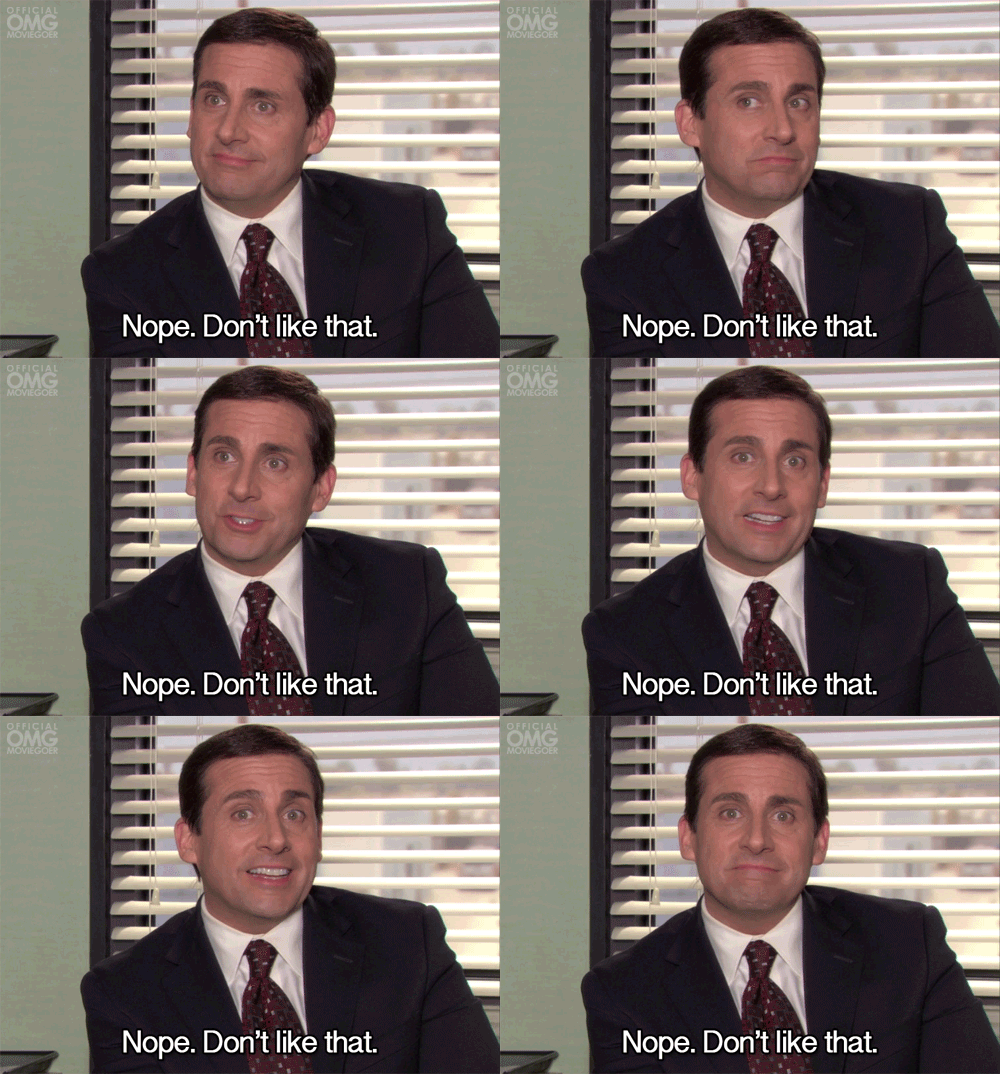
When you lose the orientation.
Each section will be a use case. The use case list match the main device orientation state that corresponds to how the user handles the device (iPad, or iPhone).
It’s important to make the difference between :
- The device orientation. UIDeviceOrientation
- The in memory picture orientation. UIImage.Orientation and UIImage
- The image file format orientation. In this article we will focus on the main image file format : JPEG and PNG.
Prerequisite : What you must know about image file format
Image file can embed metadata called EXIF (Exchangeable image file format). In the EXIF section, a property is called orientation, and the orientation value gives information to the image player about how to rotate the image buffer before presenting it on the screen.
JPEG file format embed the EXIF metadata, PNG does not. 4 consequences :
- If you load a JPEG file from UIImage init method, the UIImage orientation will match the JPEG EXIF orientation value. Then the UIImageView will have the required information to display it correctly.
- If you load the PNG file from UIImage init method, the UIImage orientation will be set to 0 (Up). The Up case is the case for which the UIImageView will not apply a rotation on the image buffer, before presenting it.
- If you save your UIImage to a JPEG file, you will not loose the orientation, and you can safely re-import the file in your application.
- If you save your UIImage to a PNG file, there is a chance that you will loose the orientation. The only case for which you will keep the orientation is the case where the UIImage orientation property is Up.
Ok, let’s talk about how iOS produces picture from the built-in camera…
Landscape Left, the simplest case
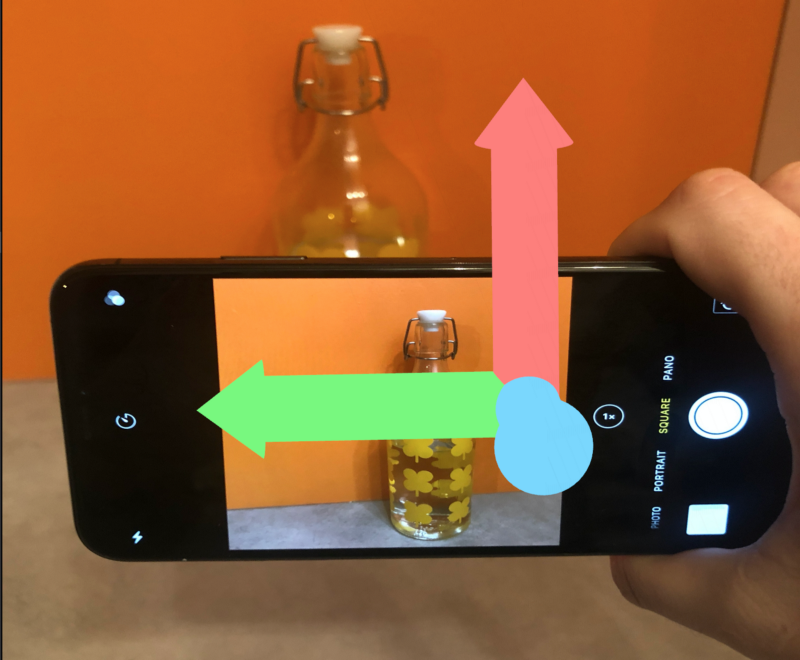
Landscape Left device orientation with internal accelerometer referential.
Taking picture in the Landscape Left device orientation, and iOS will output :
- UIImage with Up orientation
Then,
- Save image to JPEG with EXIF orientation property will be set to 1
- Save image to PNG and you will not loose the orientation
Landscape Right
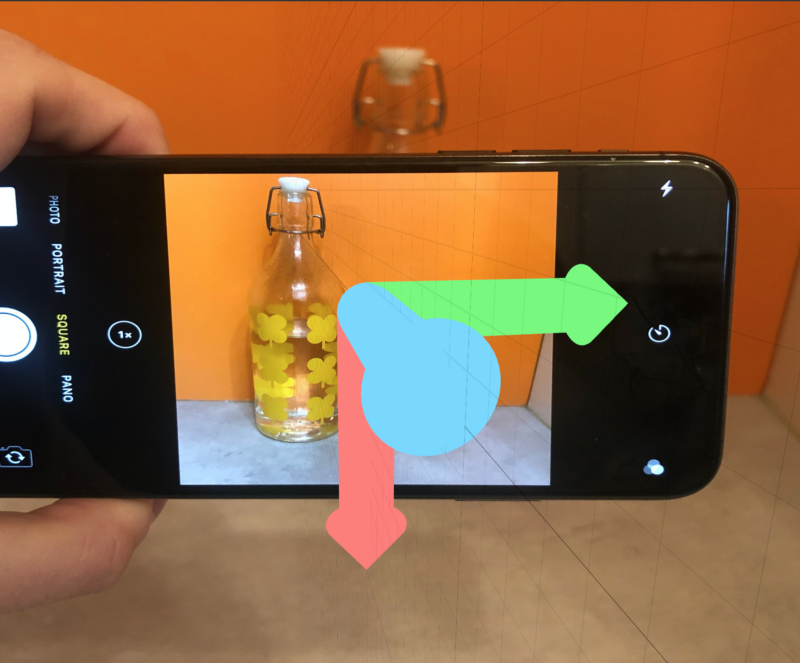
Landscape Right device orientation with internal accelerometer referential.
Taking picture in the Landscape Right device orientation, and iOS will output :
- UIImage with Down orientation
Then,
- Save image to JPEG with EXIF orientation property will be set to 3
- Save image to PNG and the orientation will be lost
Portrait
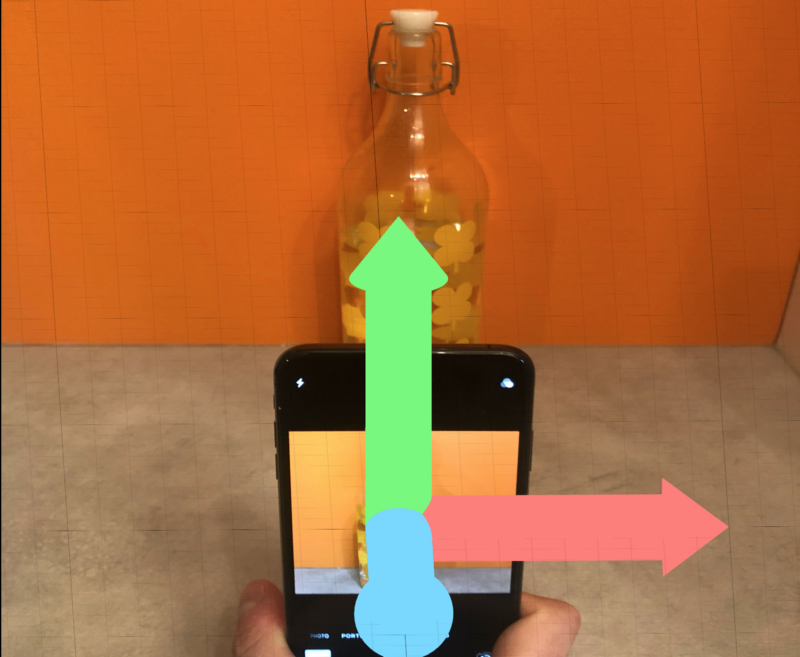
Portrait device orientation with internal accelerometer referential.
Taking picture in the Portrait device orientation, and iOS will output :
- UIImage with Right orientation
Then,
- Saving image to JPEG with EXIF orientation property will be set to 6
- Save image to PNG and the orientation will be lost
Portrait upside down
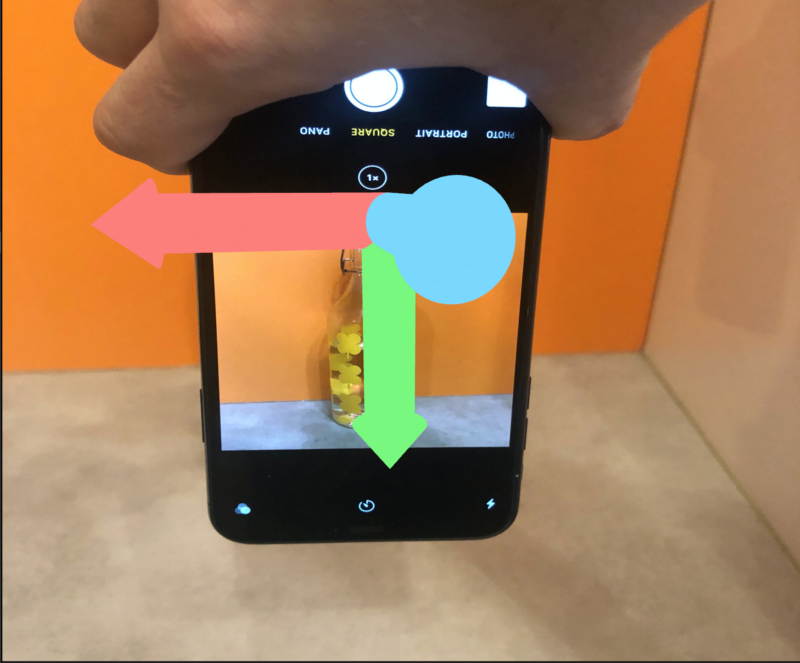
Portrait upside down device orientation with internal accelerometer referential.
Taking picture in the Portrait upside down device orientation, and iOS will output :
- UIImage with Left orientation
Then,
- Saving image to JPEG with EXIF orientation property will be set to 8
- Save image to PNG and the orientation will be lost
Face up, we start the… interesting use cases
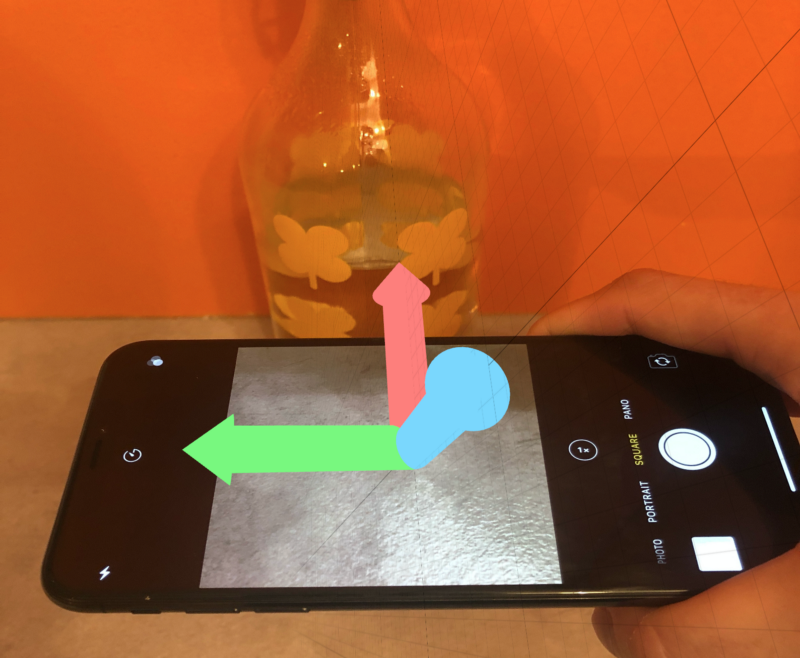
Face Up device orientation with internal accelerometer referential.
History! This how iOS solves this undetermined use case and the next. The last device orientation (between portrait, portrait upside down, landscape left, landscape right) will be the property on which the UIImage orientation will be calculated.
There are 4 sub cases :
- Portrait -> Face Up : UIImage will have a Right orientation.
- Portrait Upside down-> Face Up : UIImage will have a Left orientation.
- Landscape Left -> Face Up : UIImage will have an Up orientation.
- Landscape Right -> Face Up : UIImage will have a Down orientation.
Face down
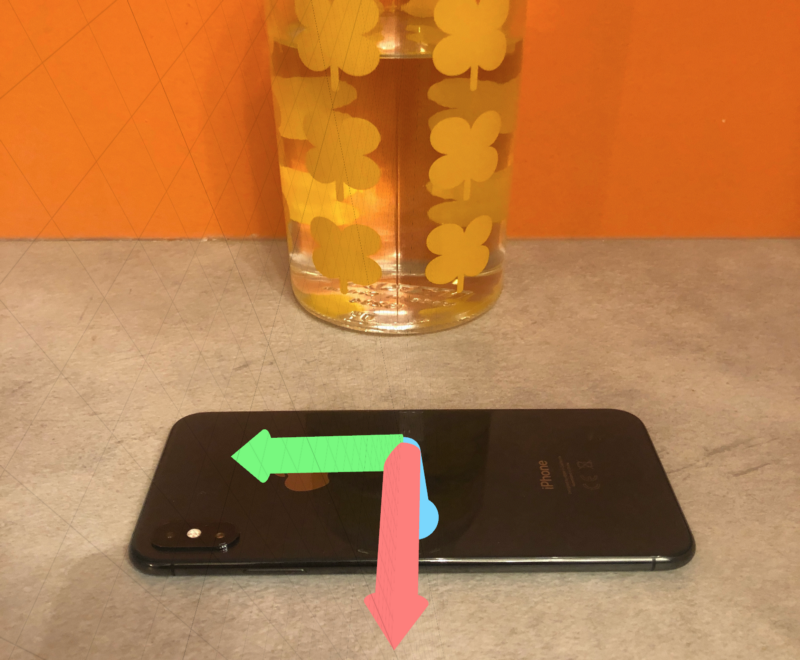
Face Down device orientation with internal accelerometer referential.
Same story, there are 4 sub cases :
- Portrait -> Face Down: UIImage will have a Right orientation.
- Portrait Upside down-> Face Down: UIImage will have a Left orientation.
- Landscape Left -> Face Down: UIImage will have an Up orientation.
- Landscape Right -> Face Down: UIImage will have a Down orientation.
From what we learned, what should we understand
My advice is that you must be watchful about your workflow. Some workflows are orientation-safe. You don’t have to worry :
- Import JPEG > Display picture > Export JPEG
- Import PNG > Display picture > Export JPEG
- Import PNG > Display picture > Export PNG
Some workflows can be destructive :
- Import JPEG -> Display picture -> Export PNG
- Use device camera > Export PNG
Some workflow has undetermined configurations :
- Use device camera > Export JPEG
Why the last case is not orientation-safe?
Because, when the user handles the camera in the Face Down or Face Up position, you have no guarantee that the last device orientation was the good one. As instance, let’s say that we want to take a picture of a printed text paper on a flat table. The text paper is oriented. If you want to read it, it’s better to be in front of it. In this case, there is no guarantee that the user will not move around the table and take the photo. iOS will retrieve the last device orientation that can produce an image orientation, and make the hypothesis that it is the good orientation.
In this undetermined case, my advice will be to use the Vision framework, test all the orientation and keep the orientation that will optimize the number of recognized characters.